Documentation
Welcome to WARMUP Doc. ! Learn How to Install Ubuntu 22.04 LTS Server On your Server Machine.

- Once Ubuntu Installation Starts First of All we have to Select a Language
- Select English
- Hit Enter to Goto Next Page.
- Or Hit Done/Continue at the End of Screen
- Installation will proceed to next screen.
- Go to Done Button by Down Arrow Key and Hit Enter
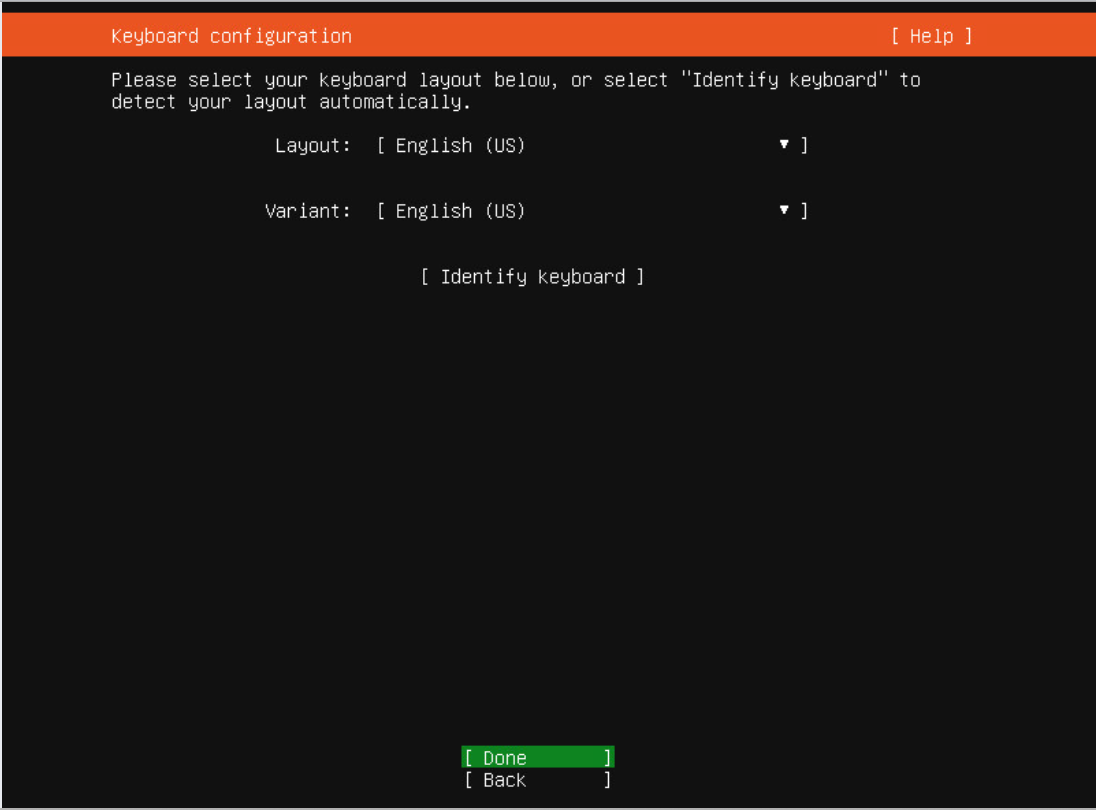
- Keyboard Setting is already set so no changes on this screen.
- Installation will proceed to next screen.
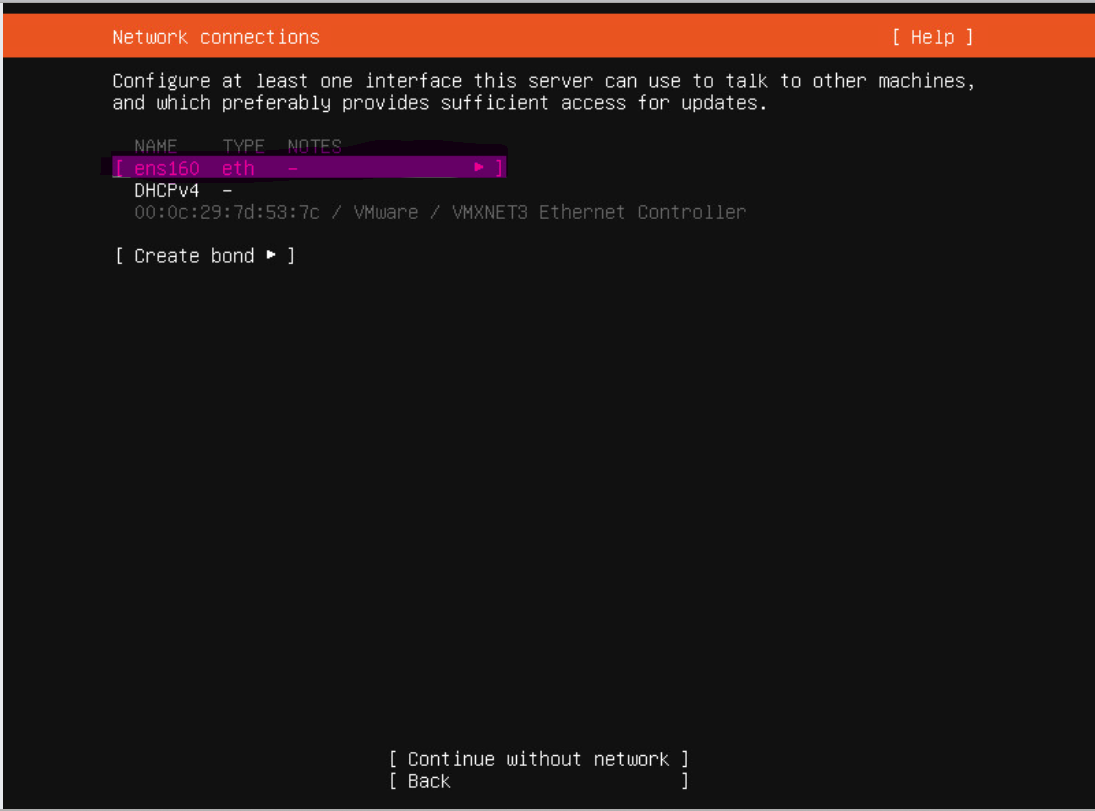
- Click on First eth Option as highlighted in Image
- Installation will proceed to next screen.
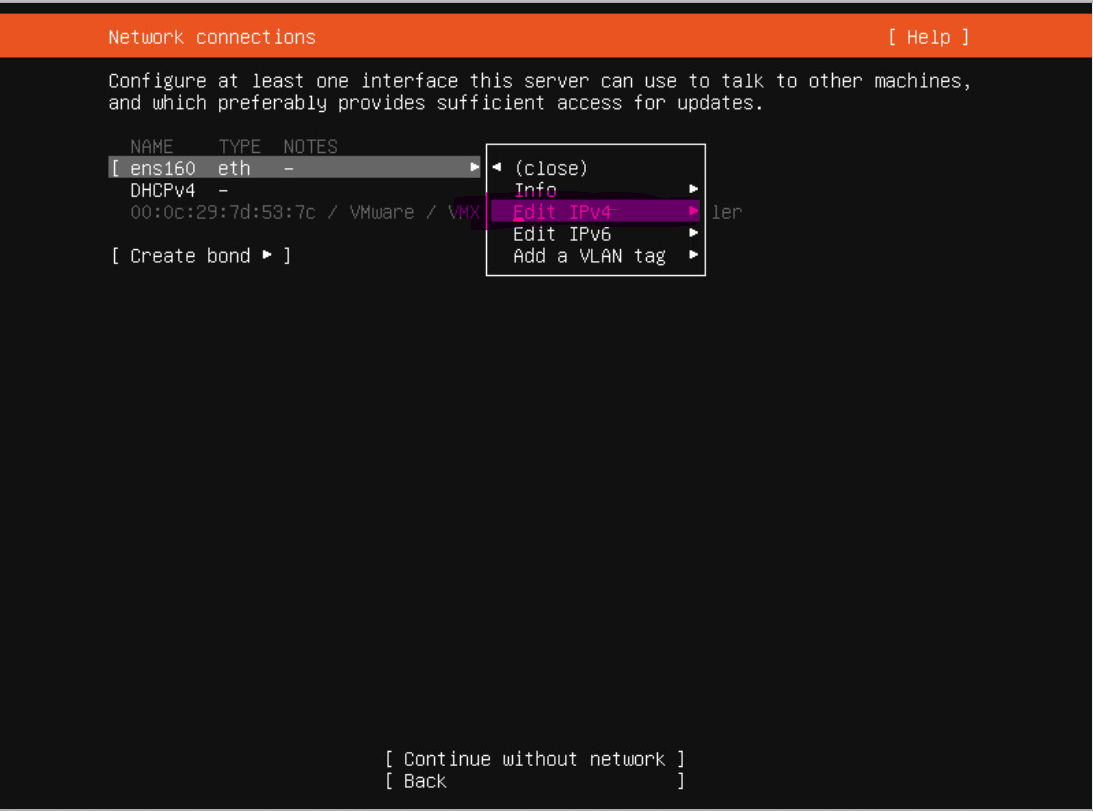
- Click on Edit IPV4 Option as highlighted in Image
- Installation will proceed to next screen.
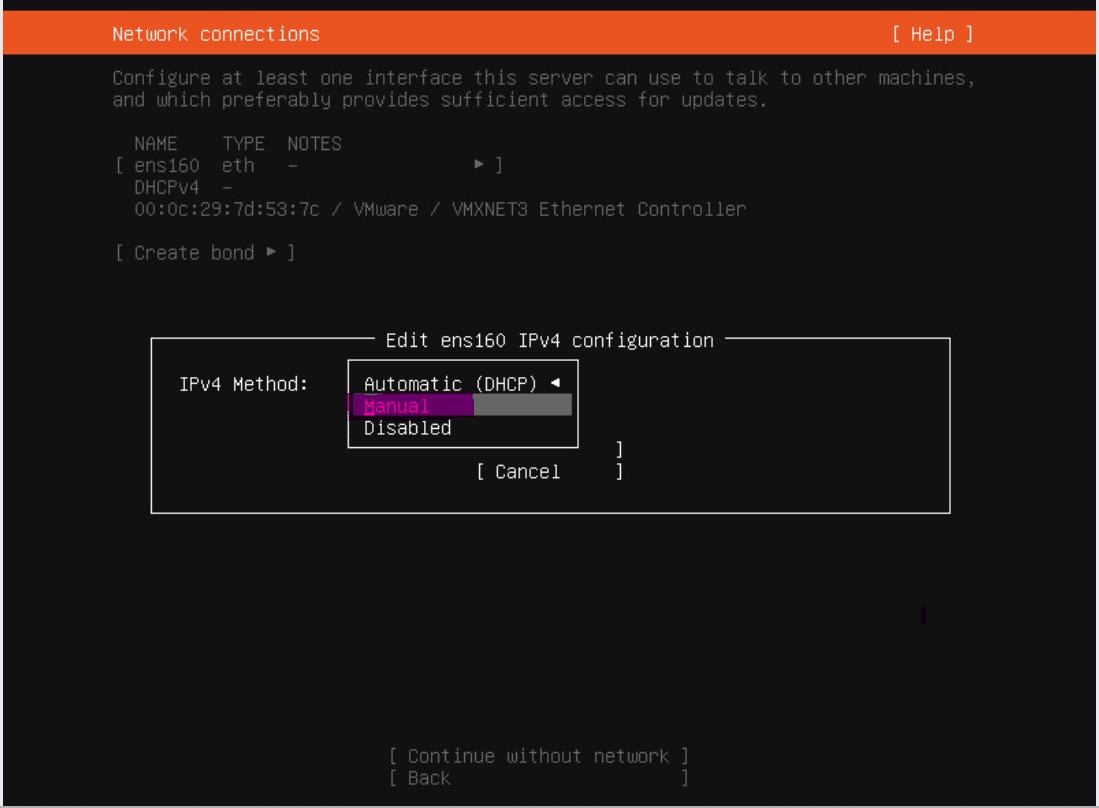
- Click on Manual Option as highlighted in Image
- Installation will proceed to next screen.

- A New Window will open to Setup Manual IP Address
- Let me Tell you that I have to setup this server with Public IP Address
- My IP Details are: I have a Public IP 202.69.63.101 with /29 Pool
- So it Network ID/IP will be 202.69.63.96
- Its Gateway is 202.69.63.97
- Useable IPs are from .98 to .102
- I will use 202.69.63.101 IP for this Server
- So, the first Line requires Subnet which is always Network/Pool i.e. 202.69.63.96/29. I will enter it in subnet.
- Next Line Required Address which is my required IP 202.69.63.101. I will enter it and go to next input
- Next Input requires Gateway which is 202.69.63.97
- Next Input requires DNS which are generic 8.8.8.8,8.8.4.4 I will enter both DNS with , in between them.
- I will leave the domain empty and Click on Save
- Installation will proceed to next screen.
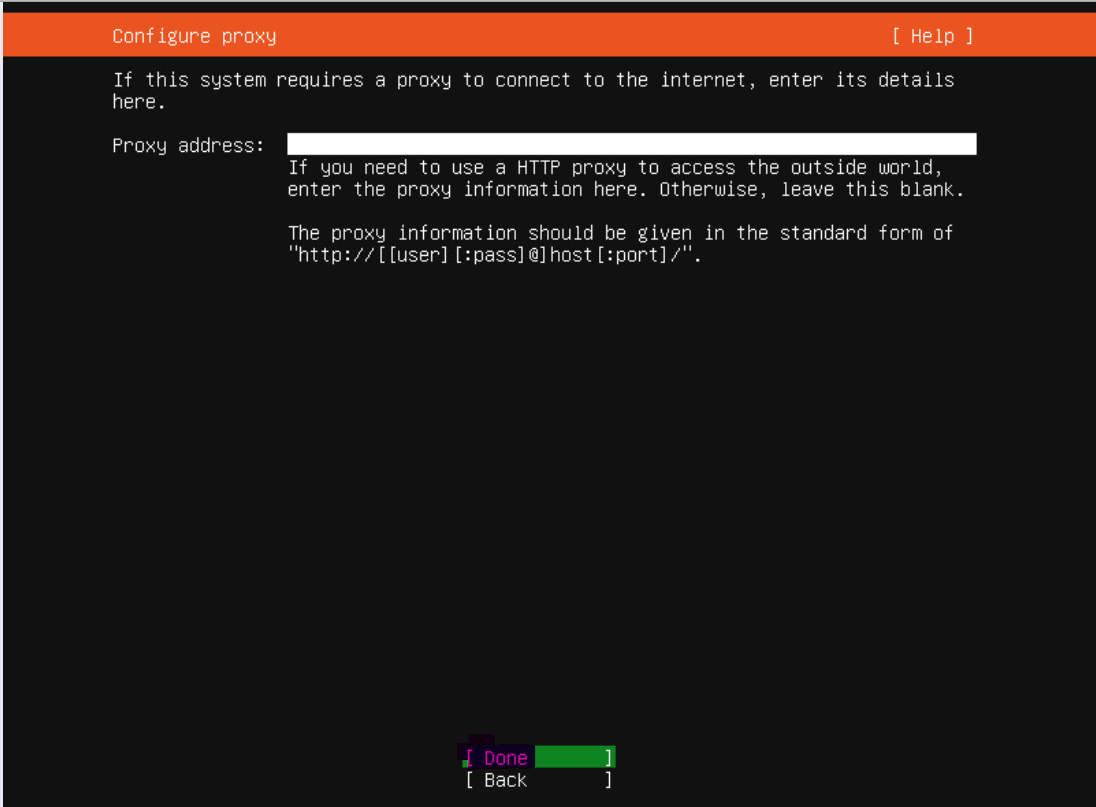
- Go to Done Button by Down Arrow Key and Hit Enter
- Proxy Setting is already set so no changes on this screen.
- Installation will proceed to next screen.
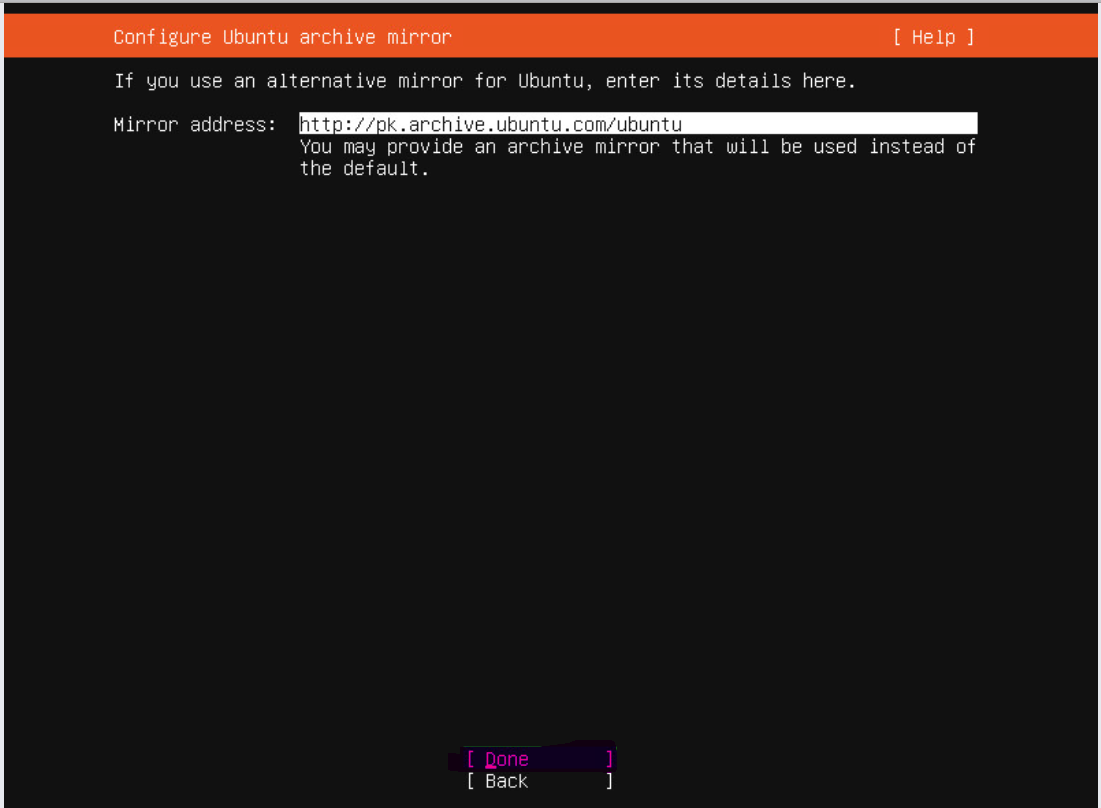
- Go to Done Button by Down Arrow Key and Hit Enter
- Mirror Setting is already set so no changes on this screen.
- Installation will proceed to next screen.
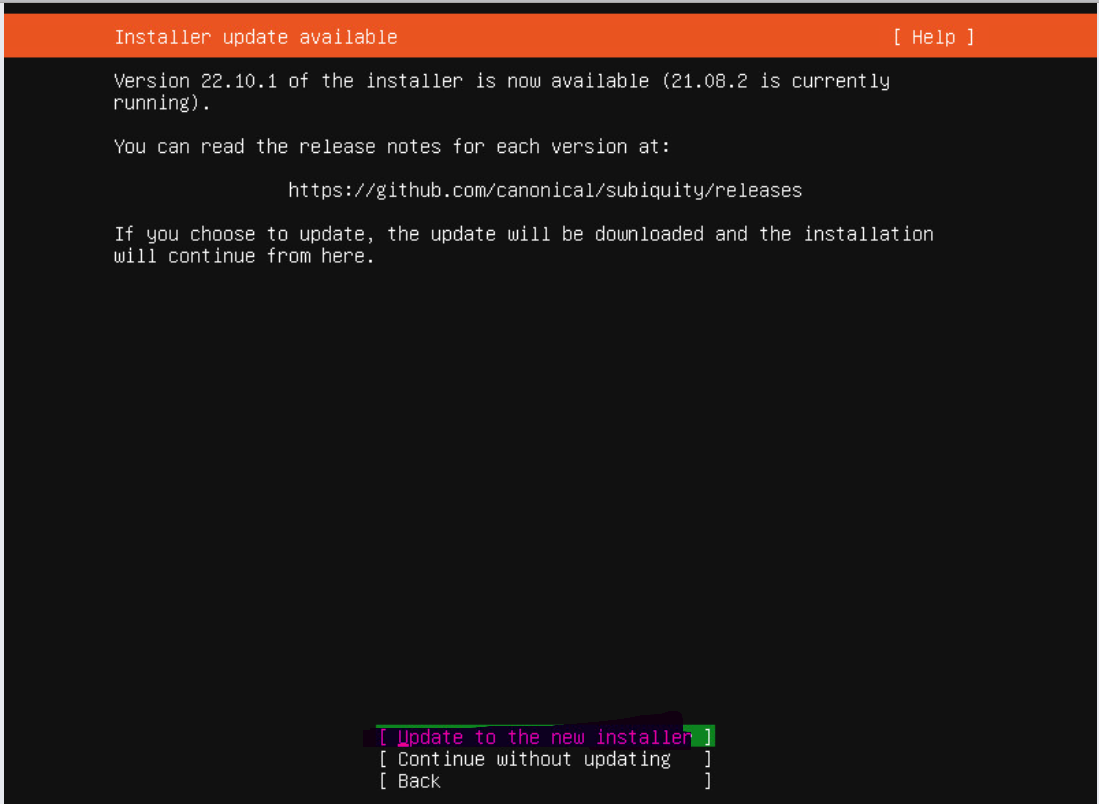
- Go to Update to New Installer Button by Up Arrow Key and Hit Enter as shown in Image
- It will update installer.
- Installation will proceed to next screen.
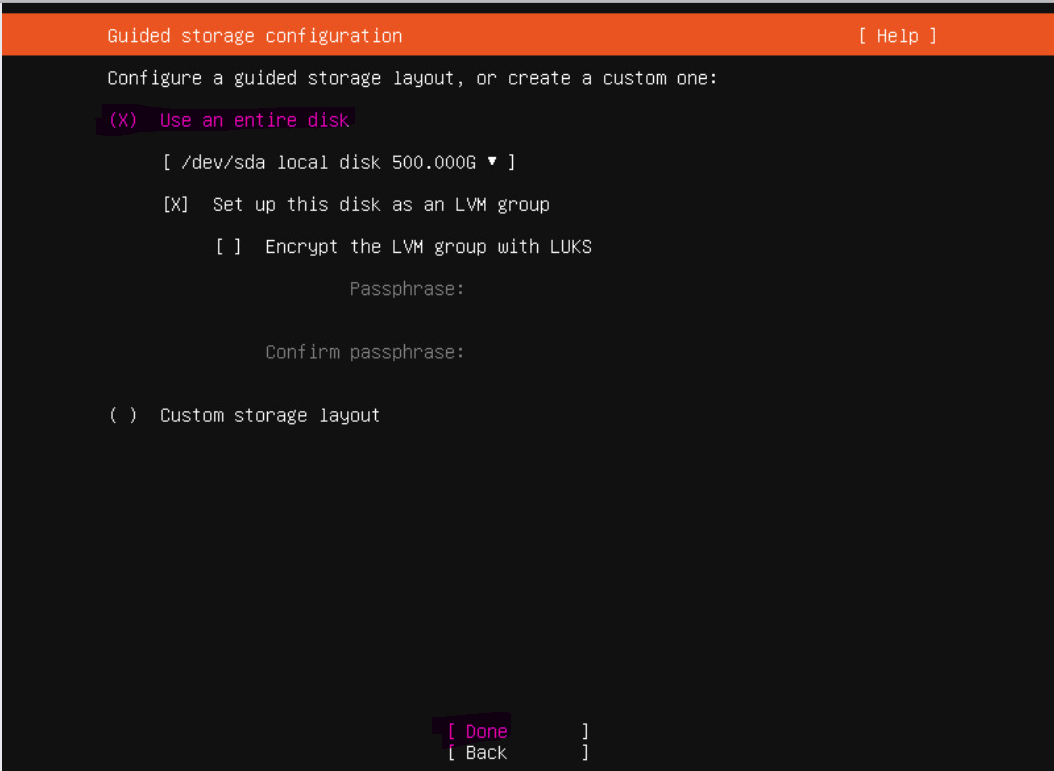
- Go to Use Entire Disk Click Space to Select it. (x) must be shown as in Image. (by default it is selected)
- Now go down and Hit Done.
- Installation will proceed to next screen.
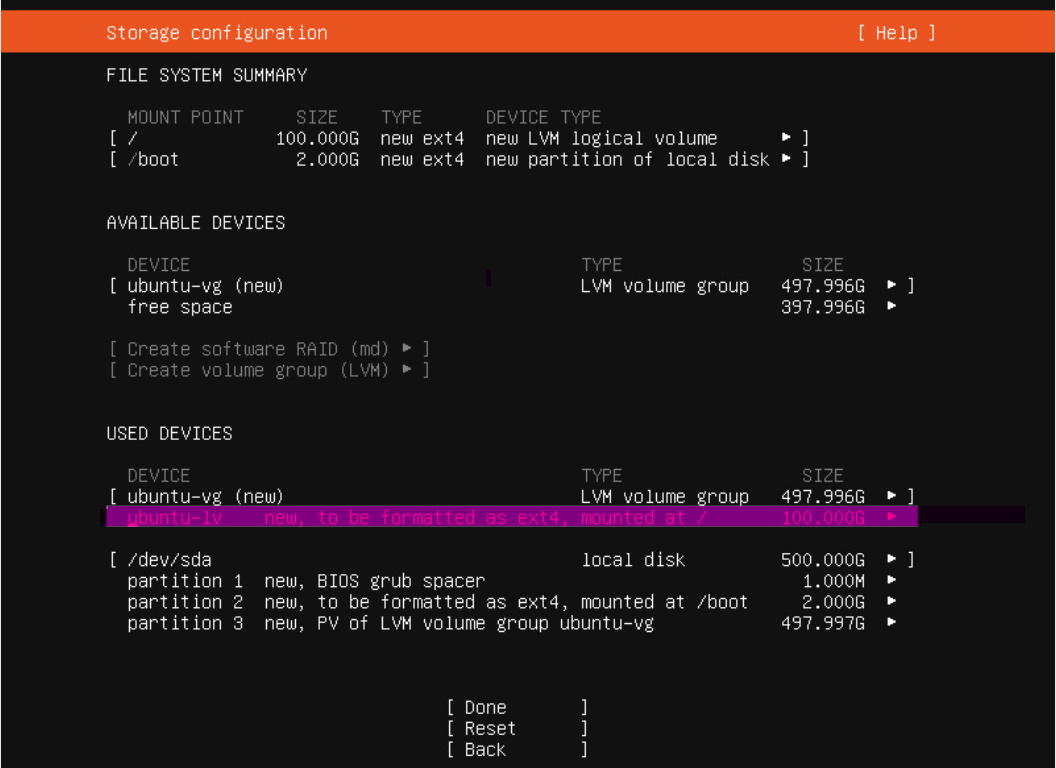
- By Default only 100GB Harddisk is Selected by Ubuntu. We have to use the Entire Harddisk. So Go to Highlighted Option as shown in image (Please select appropriate line).
- Installation will proceed to next option.

- You will find Edit Option as shown in Image. Select it by Space/Enter
- Installation will proceed to next option.
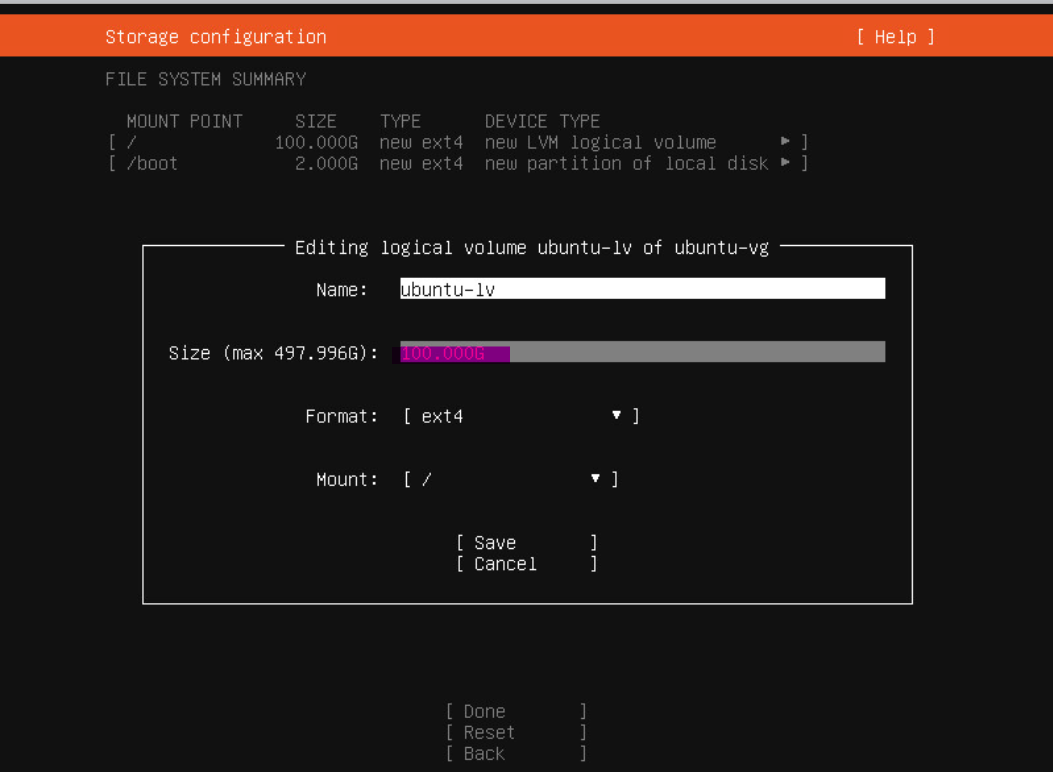
- A New Options window will open, In 2nd Option Size of Harddisk is shown 100GB
- Installation will proceed to next option.
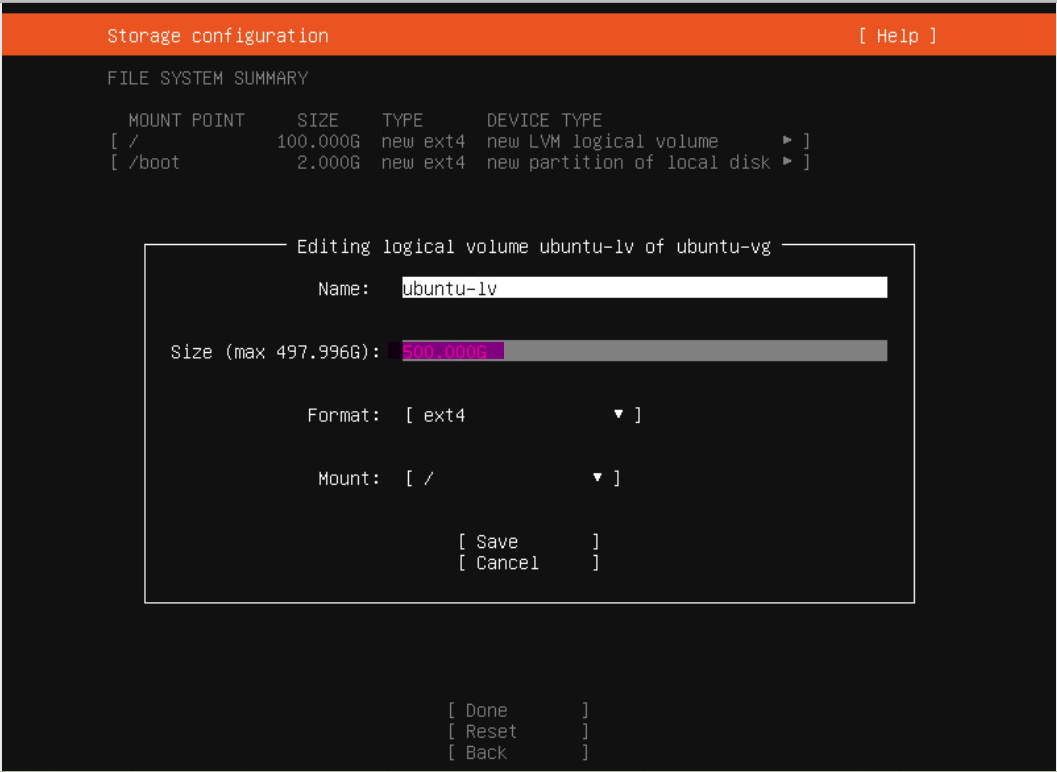
- In 2nd Option Size Enter the Maximum Harddrive Size (as shown in bracket). Like I have 500GB i will enter 500 GB. If you have 1 TB you can enter 1000GB or 1TB
- Installation will proceed to next option.
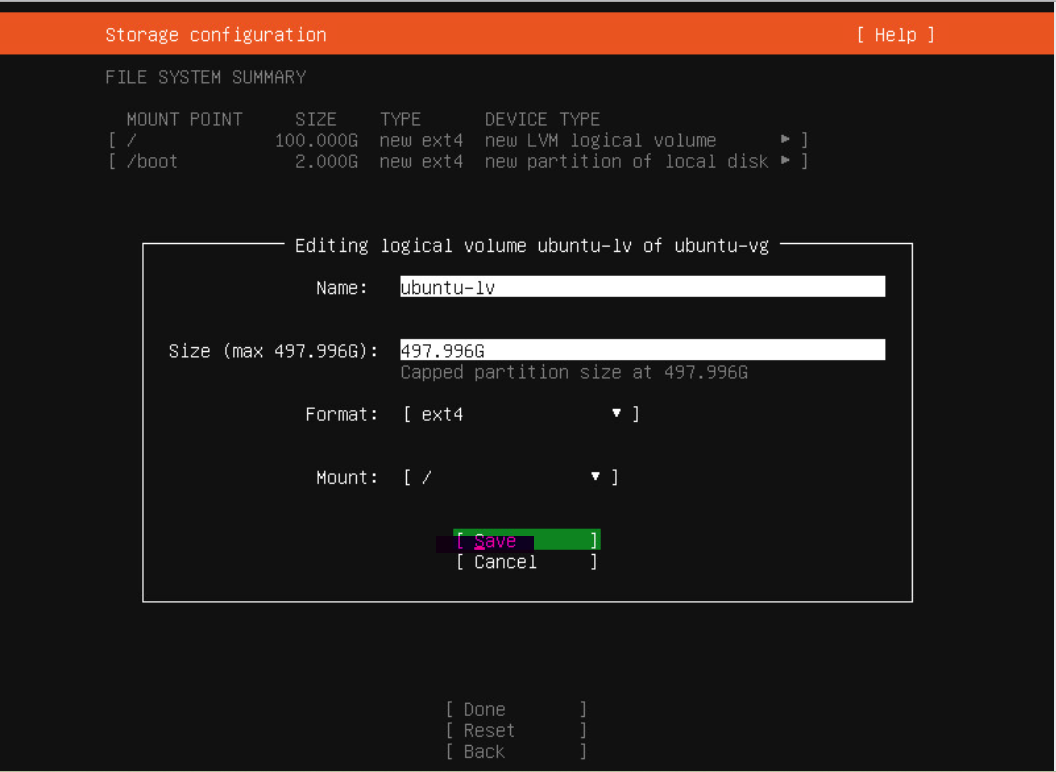
- If we enter larger size than availabe it will automatically set it.
- Go to Save and Press it.
- Installation will proceed to next option.
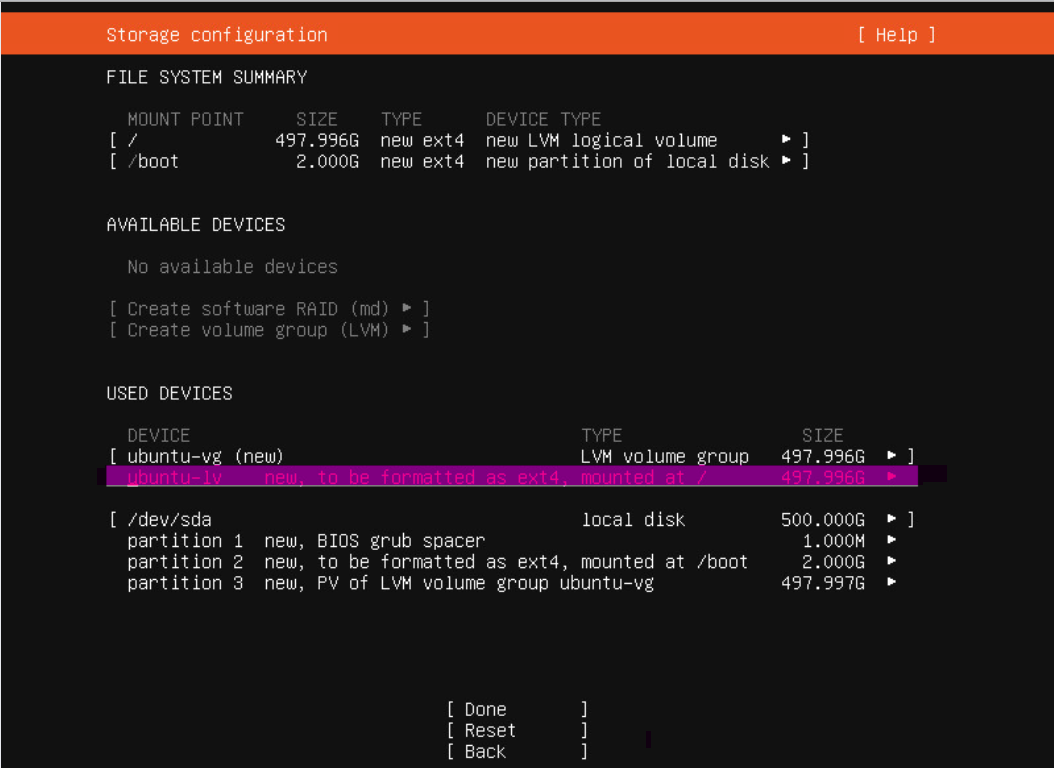
- As you can see in Highlighted Area of Image that Harddisk size is set to our required.
- Installation will proceed to next option.

- Now we can proceed to Installation.
- Go to Save and Press it.
- Installation will proceed to next option.
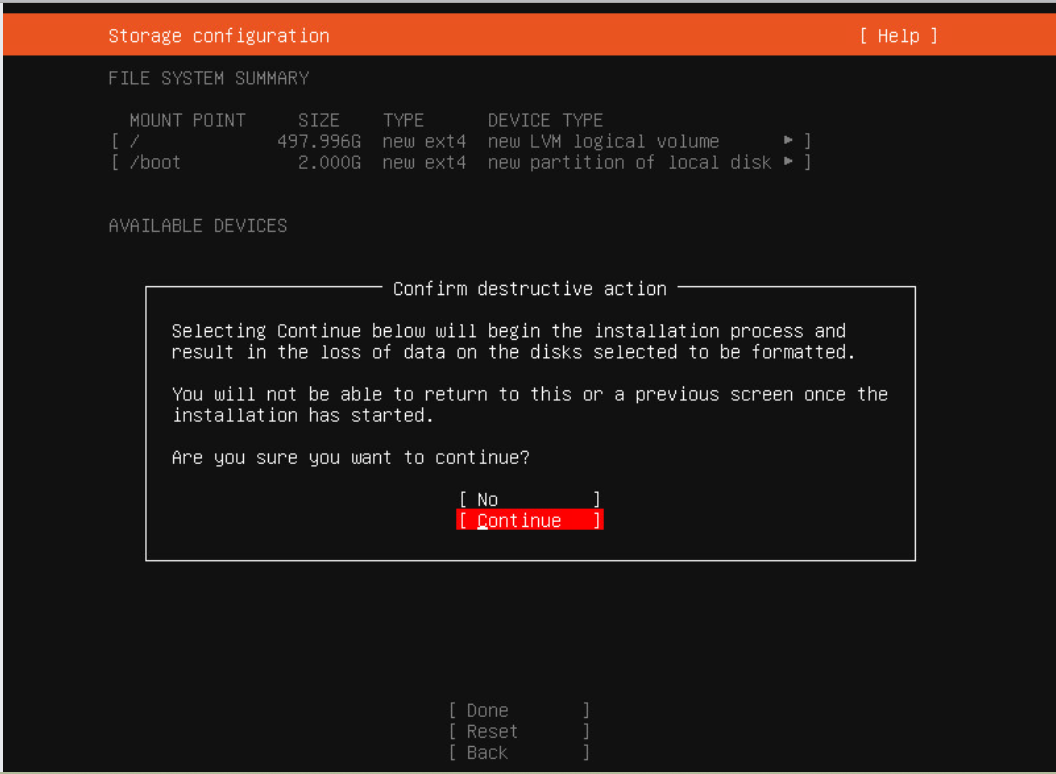
- A Popup Window Appears with Are you sure you want to continue?
- Go to Continue and Press it.
- Installation will proceed to next screen.
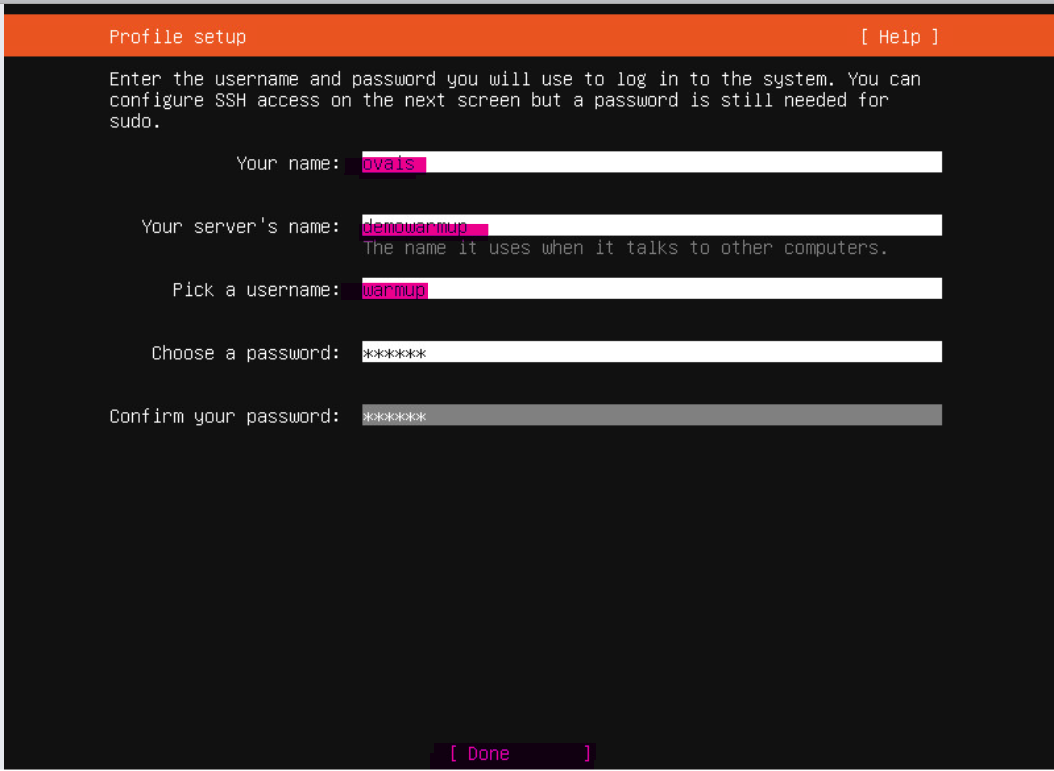
- A New Option window appears that requires our Information like:
- Your Name : Enter your name
- Your Server Name : Enter warmup
- Pick a Username : Enter Username (Remember it/Write it in a safe place)
- Choose A Password/Confirm Password : Enter Same password in both fields
- Go to Done Option Below. Click it to Save Settings and Proceed to Next Screen.
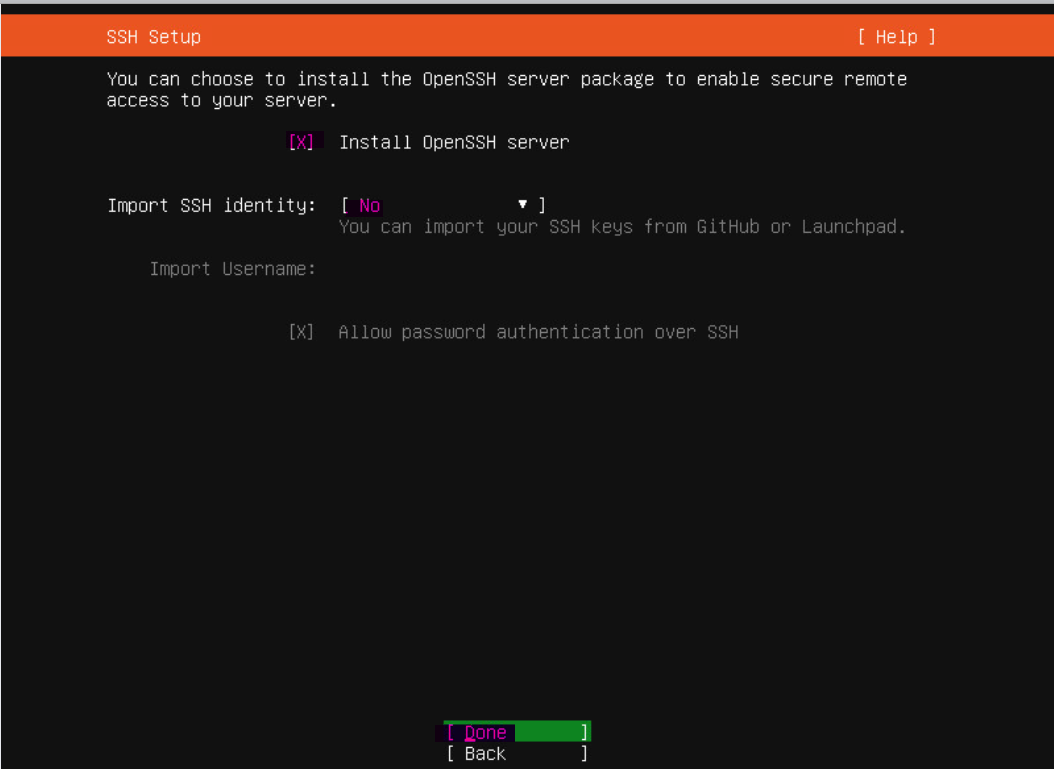
- Check Install SSH with Spacebar (x) must be shown as in Image
- Import SSH Identity must be NO (by default it is No)
- Go to Done with Down Arrow Key and Hit it.
- Installation will proceed to next screen.
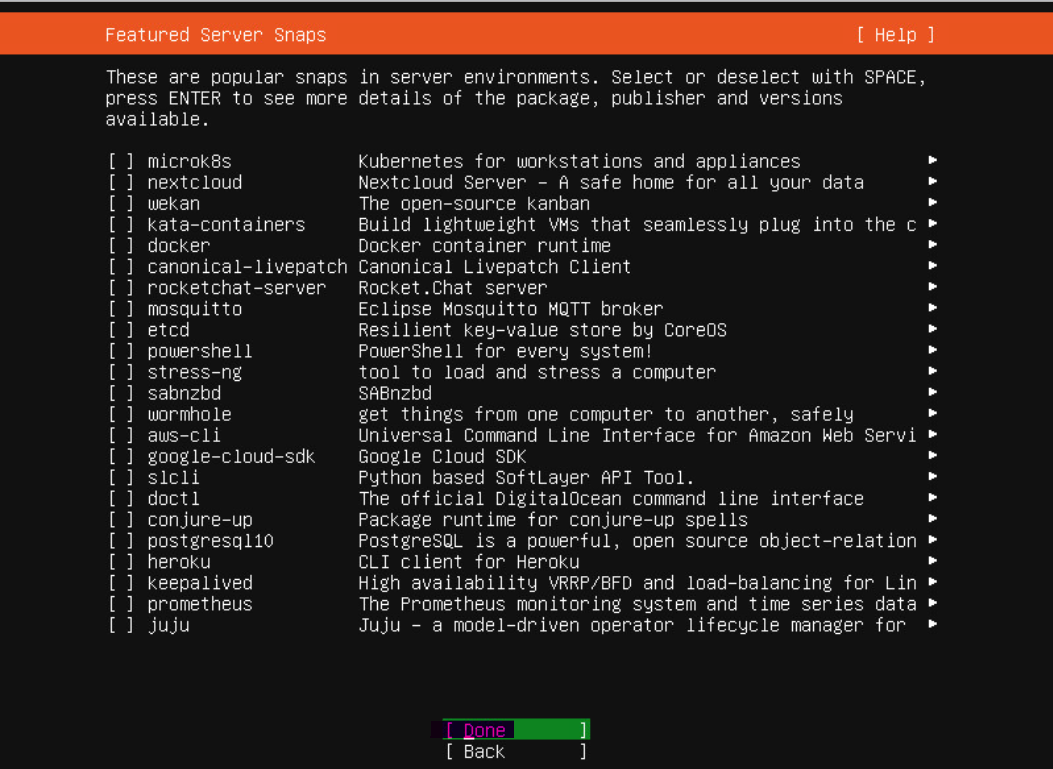
- We don't need to install any Module, So we don't select any of them.
- Go to Done with Down Arrow Key and Hit it.
- Installation will proceed to next screen.
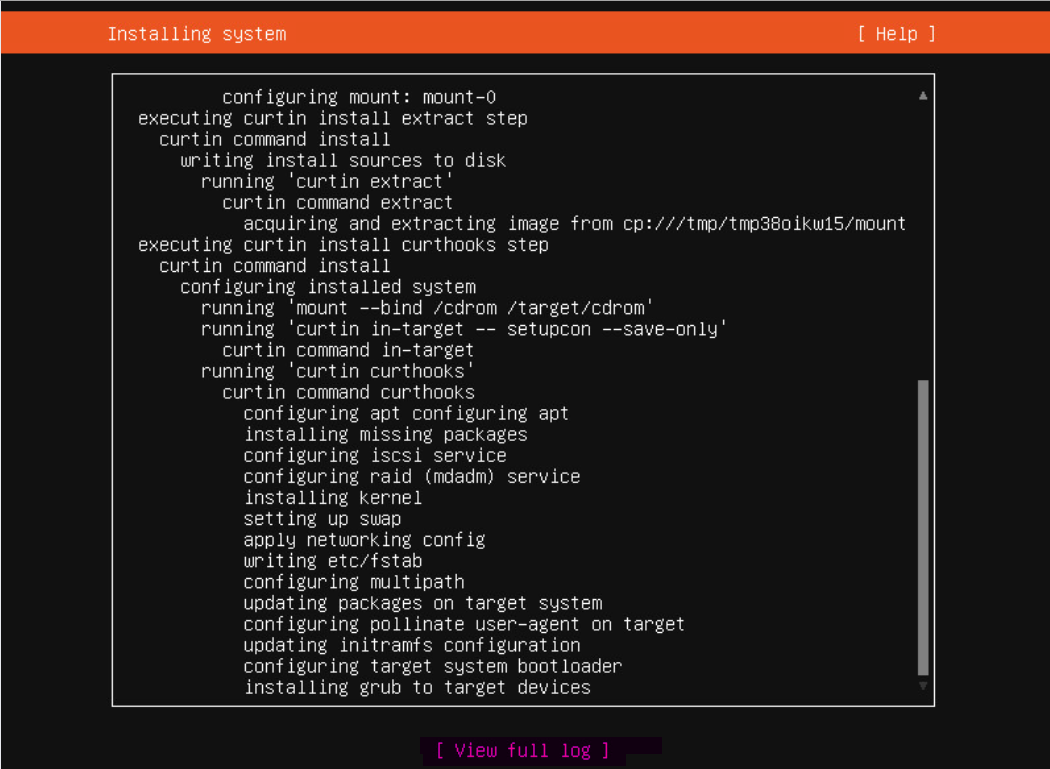
- Installation Start Now
- Once it is Completed, Update will start Automatically.
- Don't Reboot, Let the Update finish.
- Installation will proceed to next screen.
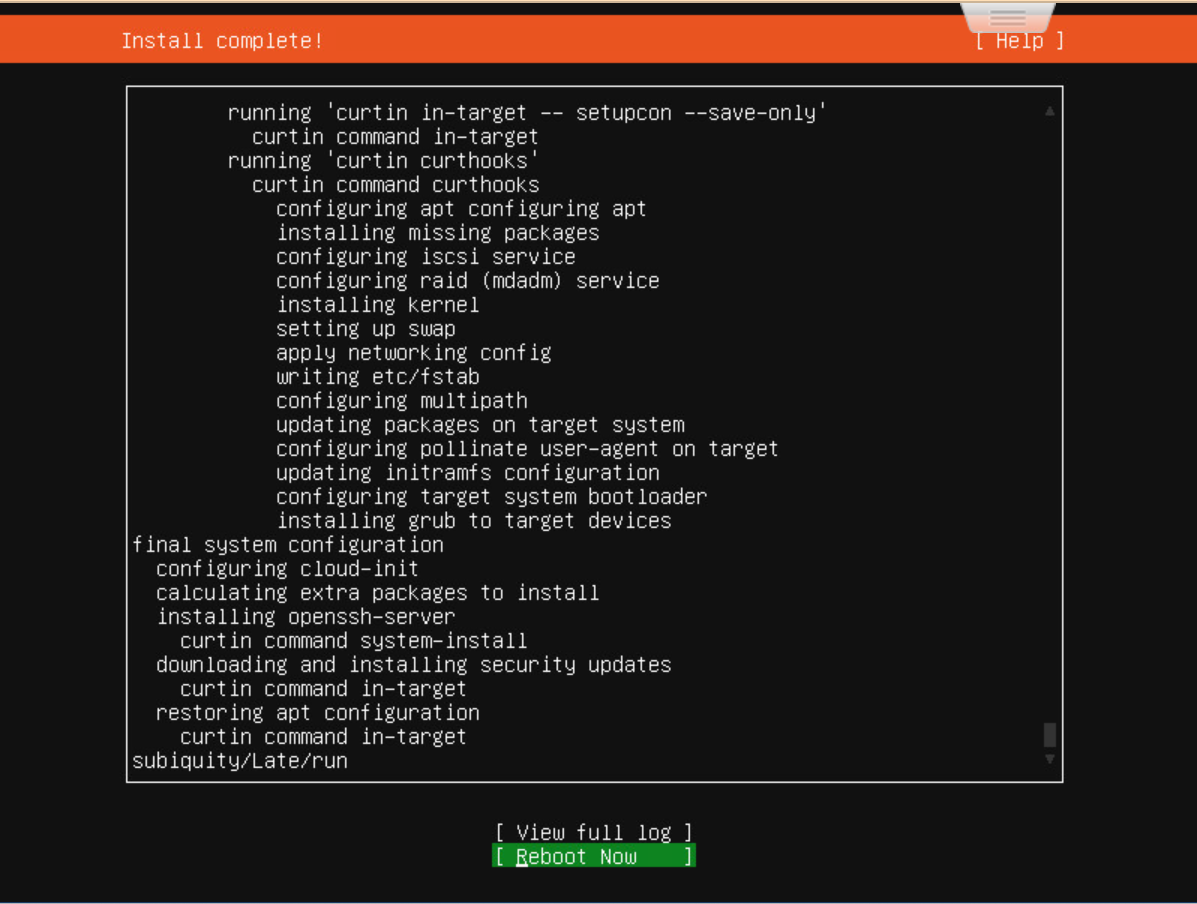
- As you can see Reboot Now button is appeared in the end of screen.
- Hence Installation is finished. Click on Reboot Button.
- Remove the Installation Media (CD/USB).
- PRESS Enter to Reboot Now.
- Installation is Complete Now!