Documentation
Welcome to WARMUP Doc. ! Learn How to Install ESXi Hypervisor Server Installation On your Server Machine. First of all download ESXi iso Setup file from this link.Download ESXi Run Rufus Bootable USB Maker and Create A Bootable USB. Remember to Select GPT option. Once created Put USB in your server machine and boot the Server from USB. Once done, ESXi Setup will start. Now follow the steps below to properly install it.
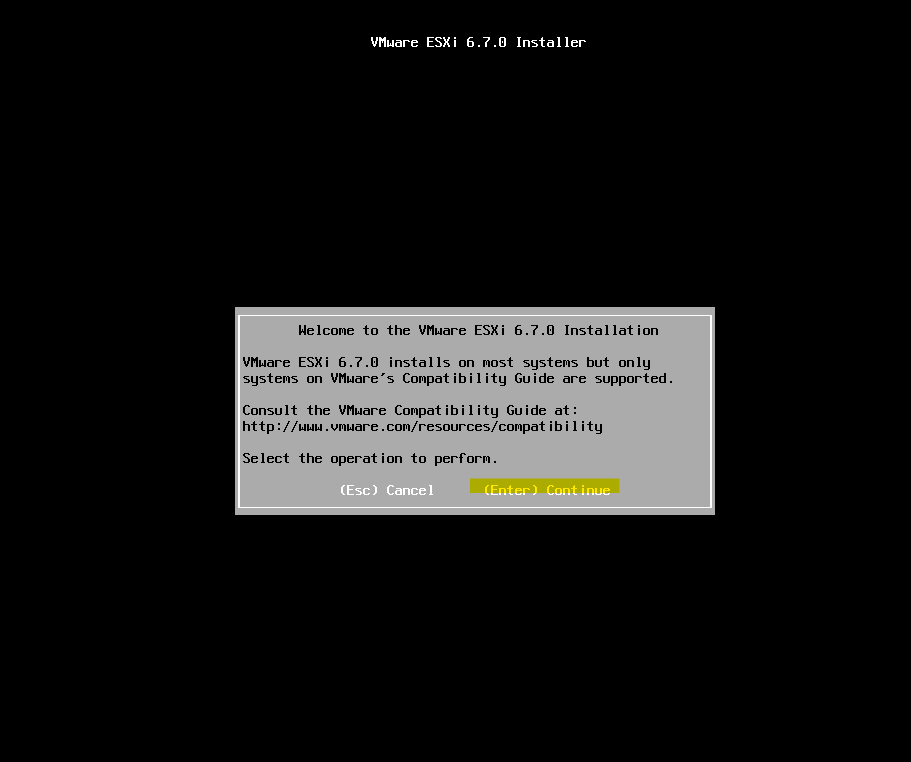
- Once ESXi OS Installation starts, we will counter this window first of all.
- Select Continue
- Hit Enter to Goto Next Window.
- Installation will proceed to next screen.
- Or Hit Cancel to stop the installation
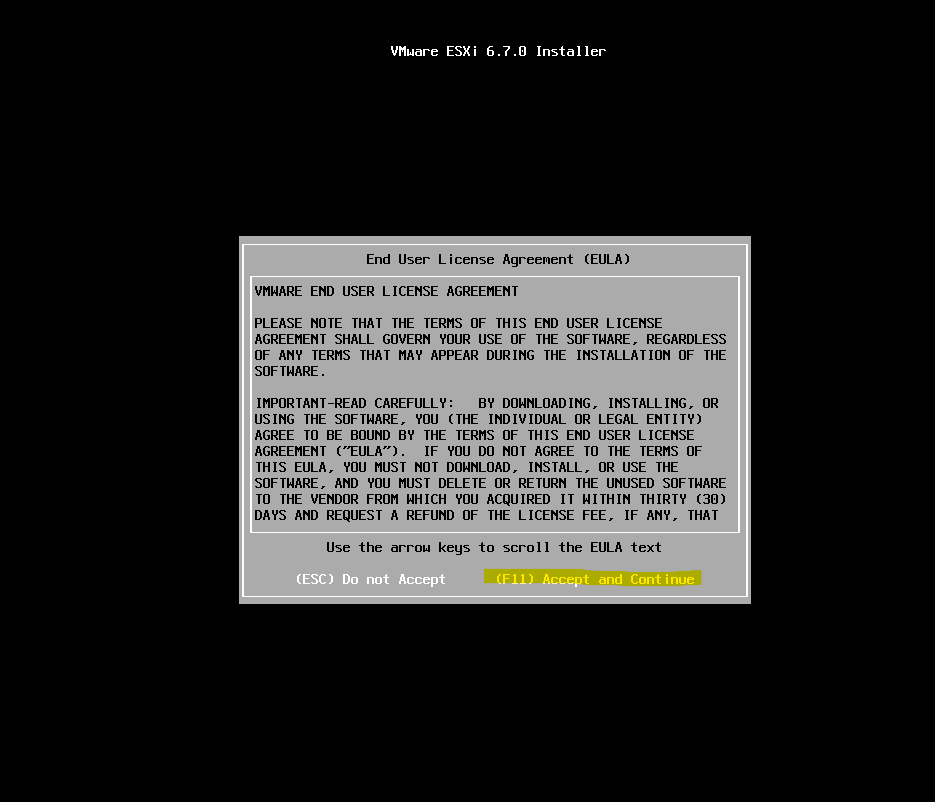
- Now you have to Accept the End User Agreement
- Go to Accept and Continue Button as highlighted in screenshot and Hit F11 to Continue.
- Installation will proceed to next screen.
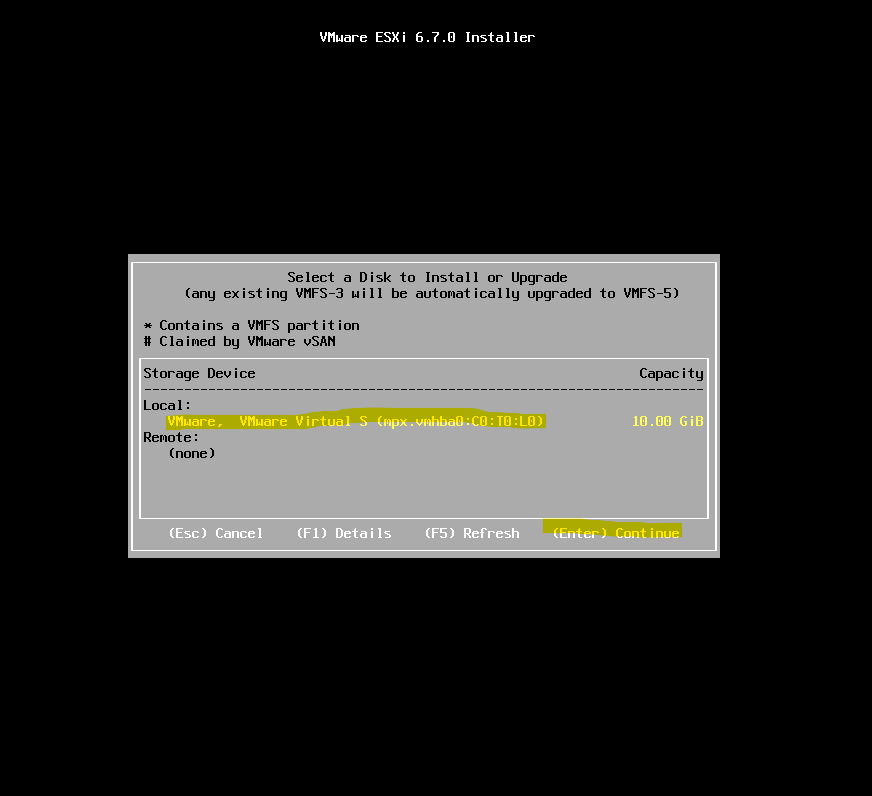
- In the Provided Table, Go to Local Section and Select the Harddrive in which you are interested to setup ESXi.
- After Selection with Keyboard down key Hit Enter to Continue.
- Installation will proceed to next screen.

- From the list of available keyboard layouts, Select US Default.
- Hit Enter to Continue.
- Installation will proceed to next screen.
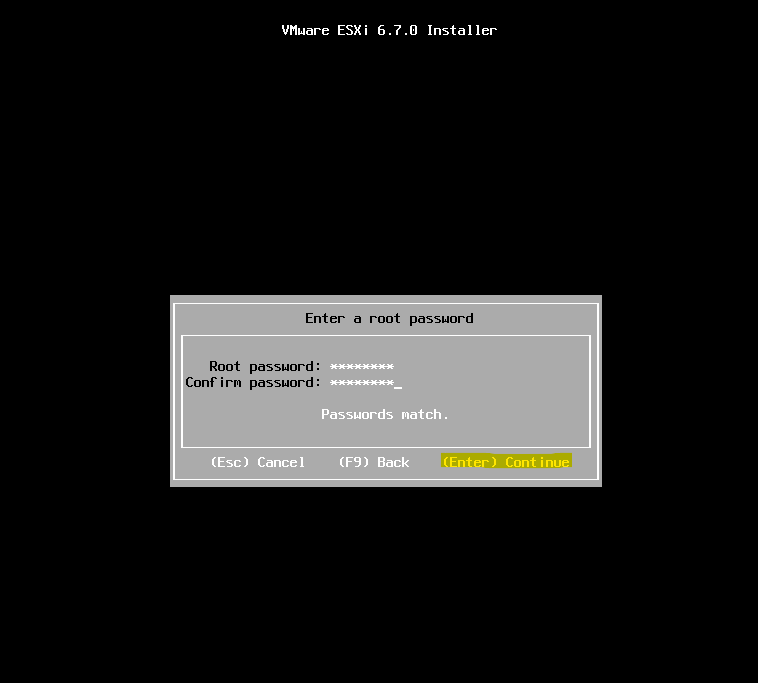
- Now You have to setup a Strong Root Password, Minimum 7 Characters are required. Our Suggestion is to use a strong password including special characters and Capital plus Lower cases and Numeric digits.
- Confirm Password, Use the same as above. Hit Enter to Continue.
- Installation will proceed to next screen.
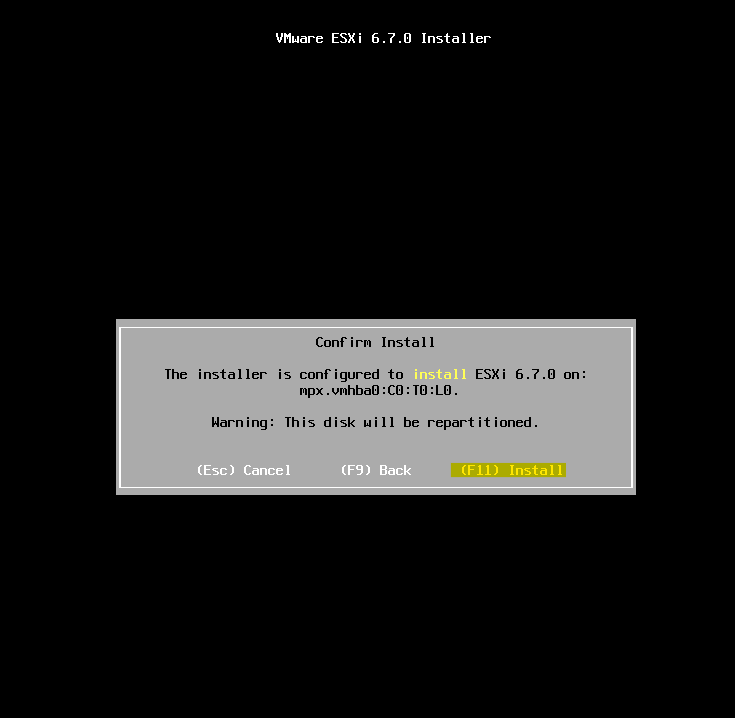
- Now as you have setup the basic setting, Now ESXi is confirming for installer to start. A warning shows that the disk/partition you have selected will be repartioned.
- Hit F11 to Install the System.
- Installation will proceed to next screen.

- Installation Progress can be seen in the screen shot.
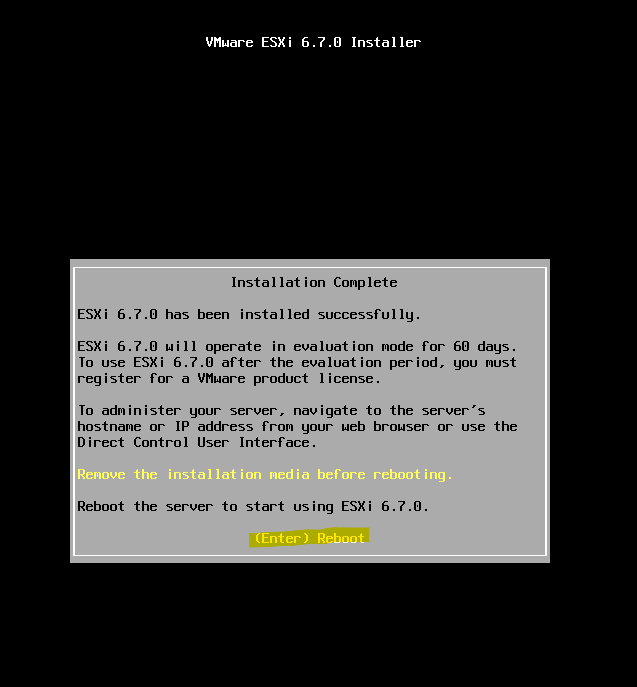
- Now the Installation is complete. Remove the USB and Hit Enter to Reboot the Server. Now the server will boot from ESXi Operating System.
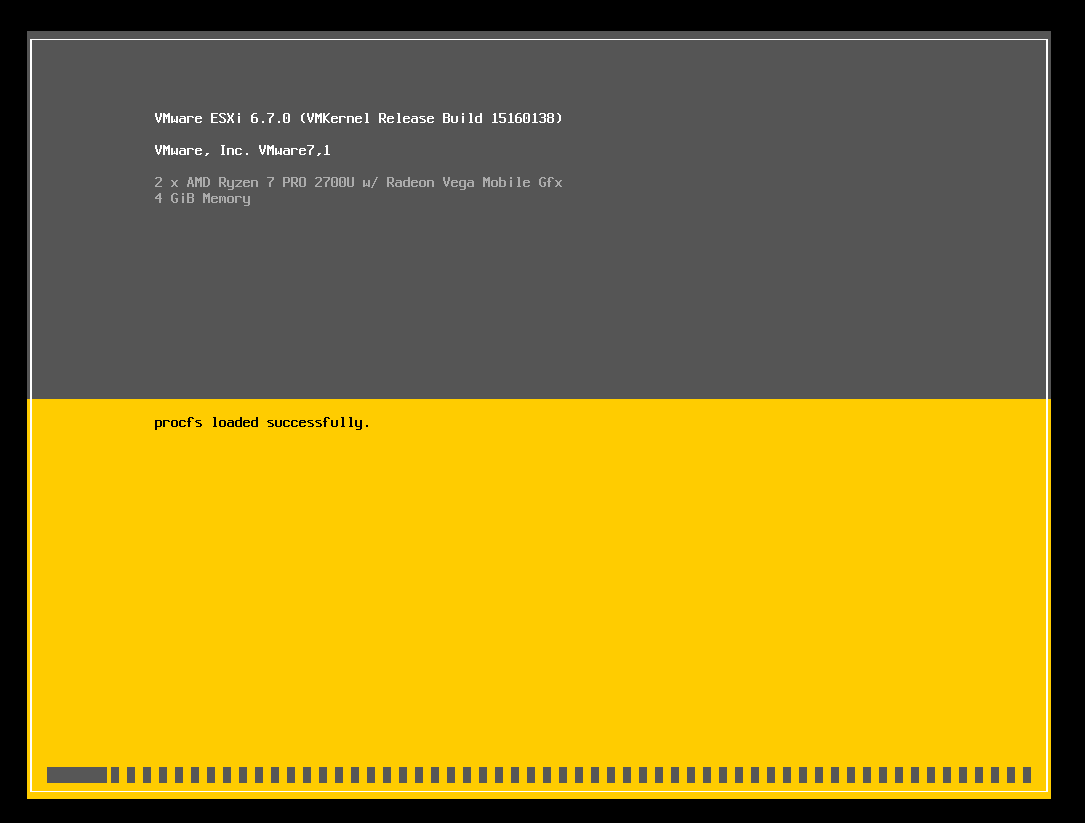
- This screen will be shown once the system starts booting from ESXi.
- After Booting it will proceed to next.
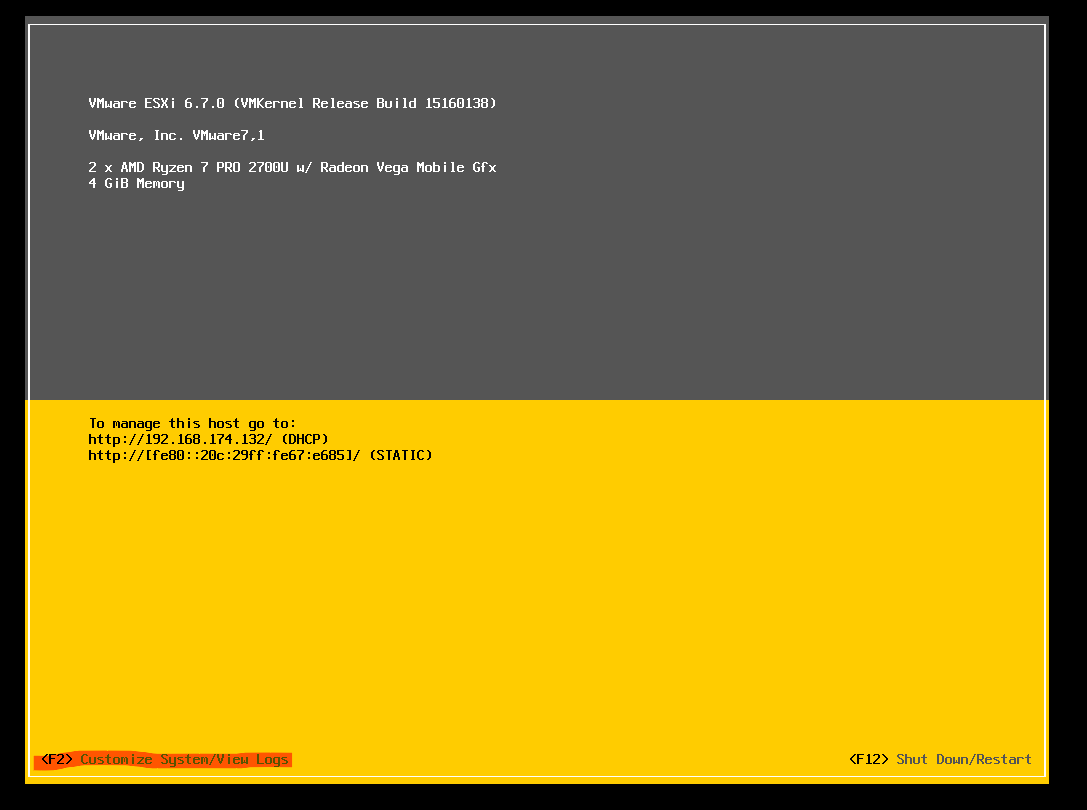
- In This Window you have to Press F2 to open Customize System View Logs
- It will proceed to next option.
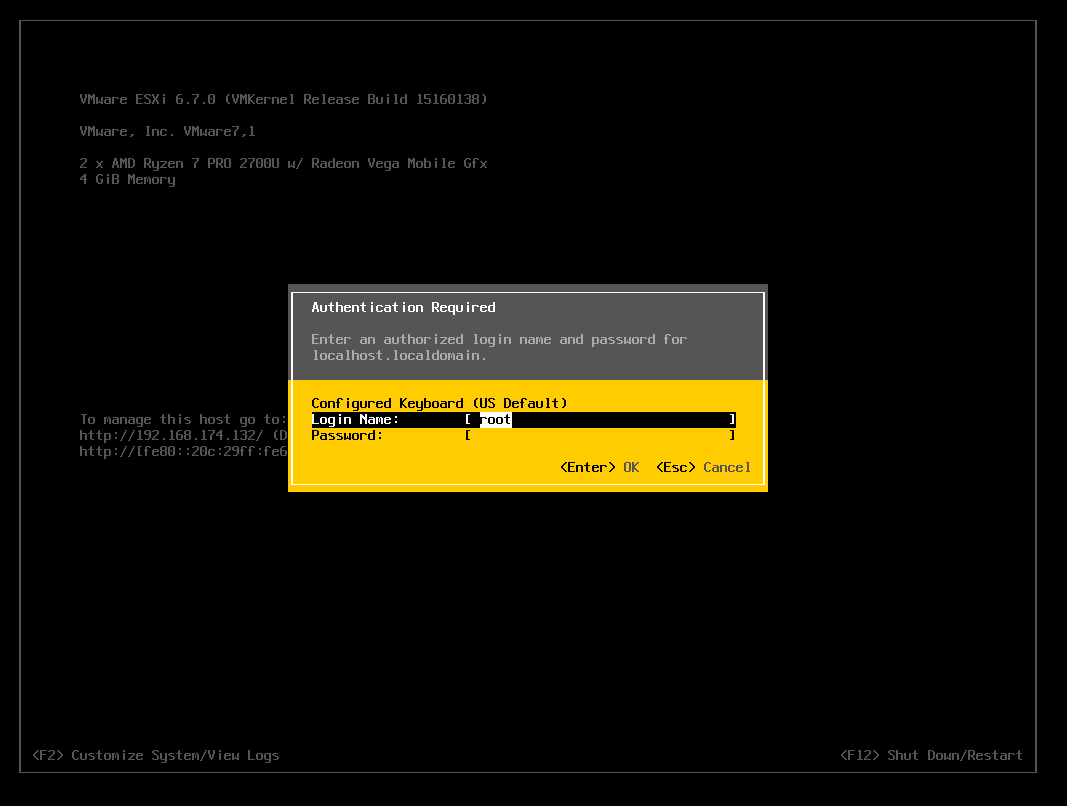
- Now system will ask you to authorize yourself as Root User.
- Enter Root Username and Password that you have set during Installation.
- It will proceed to next option.

- Now System Customization Menu has been displayed.
- We have to select Configure Management Network on this screen. Hit Enter to Continue.
- It will proceed to next option.
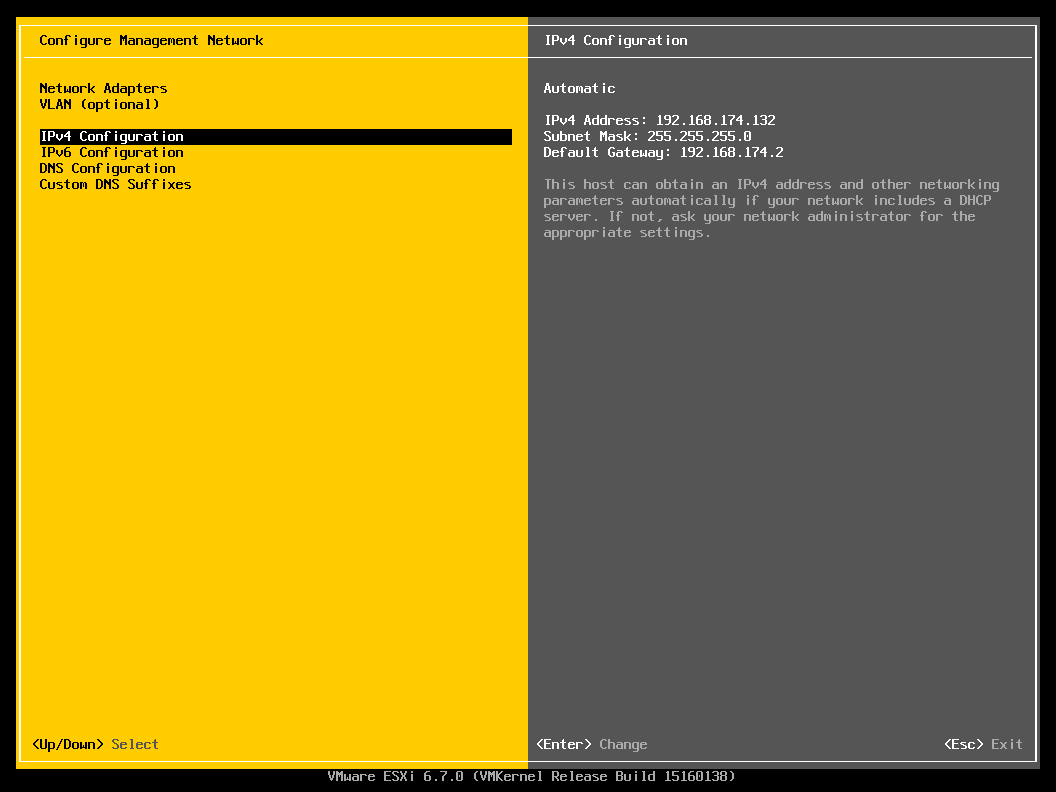
- In this screen we have to select IPV4 Configuration. Hit Enter to Proceed
- It will proceed to next option.
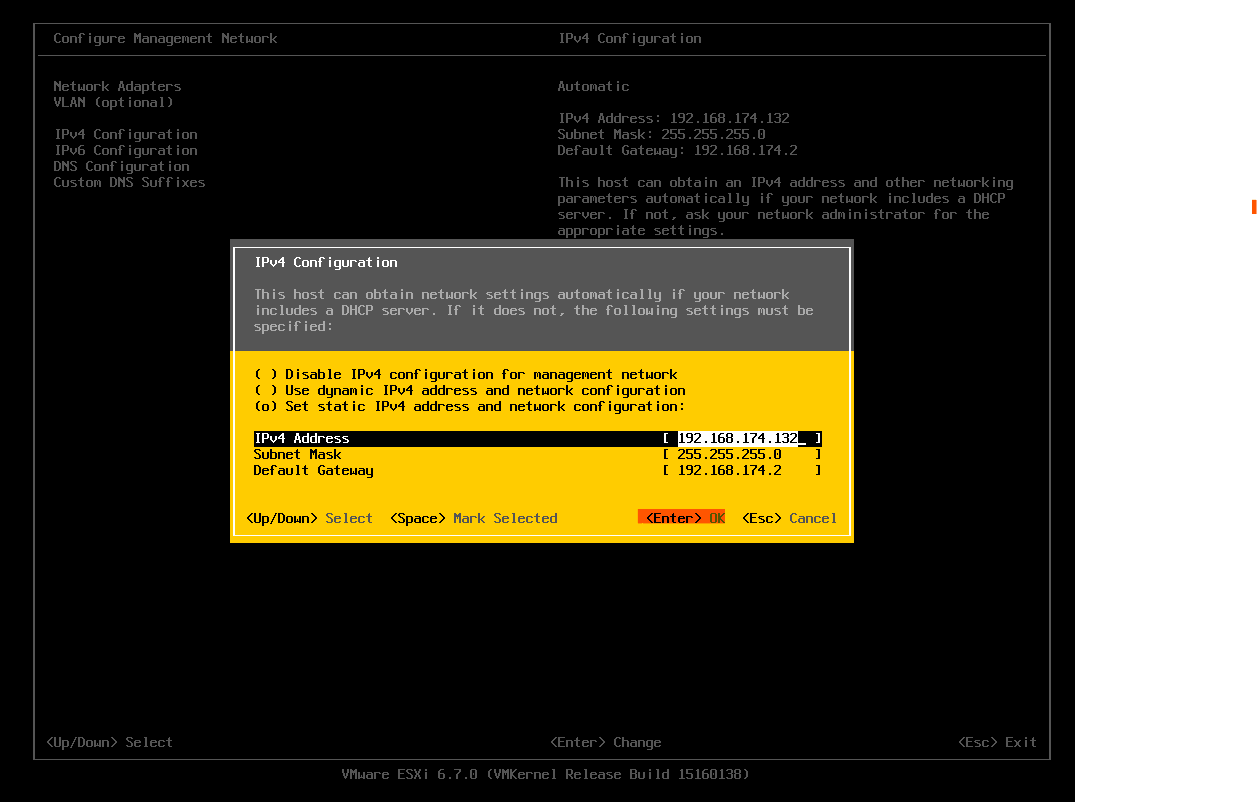
- In the New Pop Up Window, We have to select the last option that is Set Static IPv4 Address and Network Configuration.
- Now we can configure static IP for this ESXi.
- First we have to setup IPV4. (145.65.37.6)
- Next we have to provide Subnet Mask. (255.255.240.0)
- Installation will proceed to next option. (145.65.32.1)
- Remember the above example IPs are for our environment, you have to setup your own IP. Consult your Network Admin for this.
- Hit Enter to Proceed.
- It will proceed to next option.
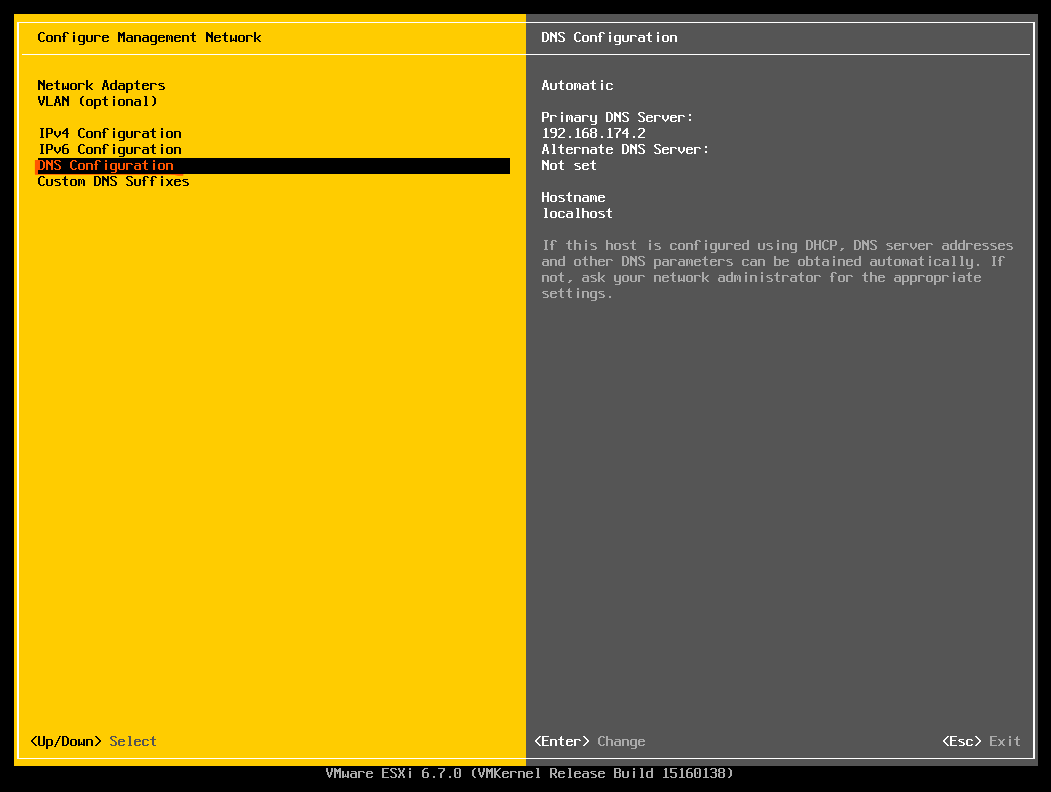
- Now we have to setup DNS Configuration
- From Configure Management Network, First we have setup IPv4, Now we will select DNS Configuration.
- Hit Enter and It will proceed to next screen.
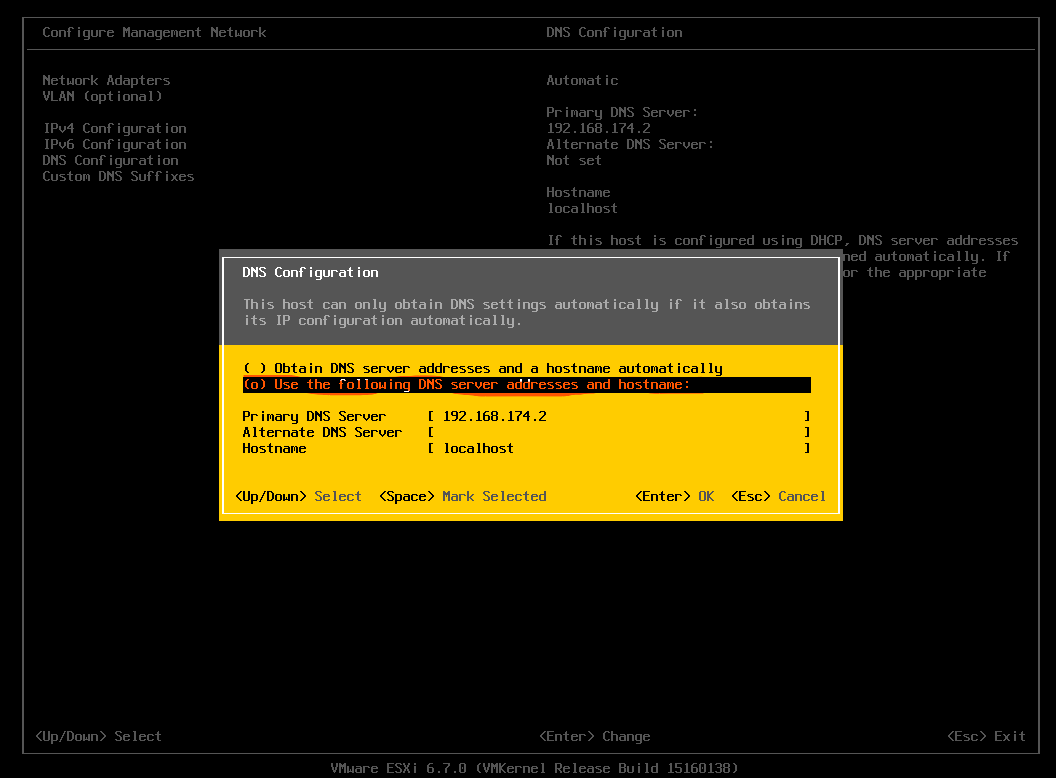
- A New Option window appears that requires DNS Information:
- We have to select the last option "Use the Following DNS Server addresses and hostname"
- It will enable the DNS Inputs, Go to Next Screen for details.
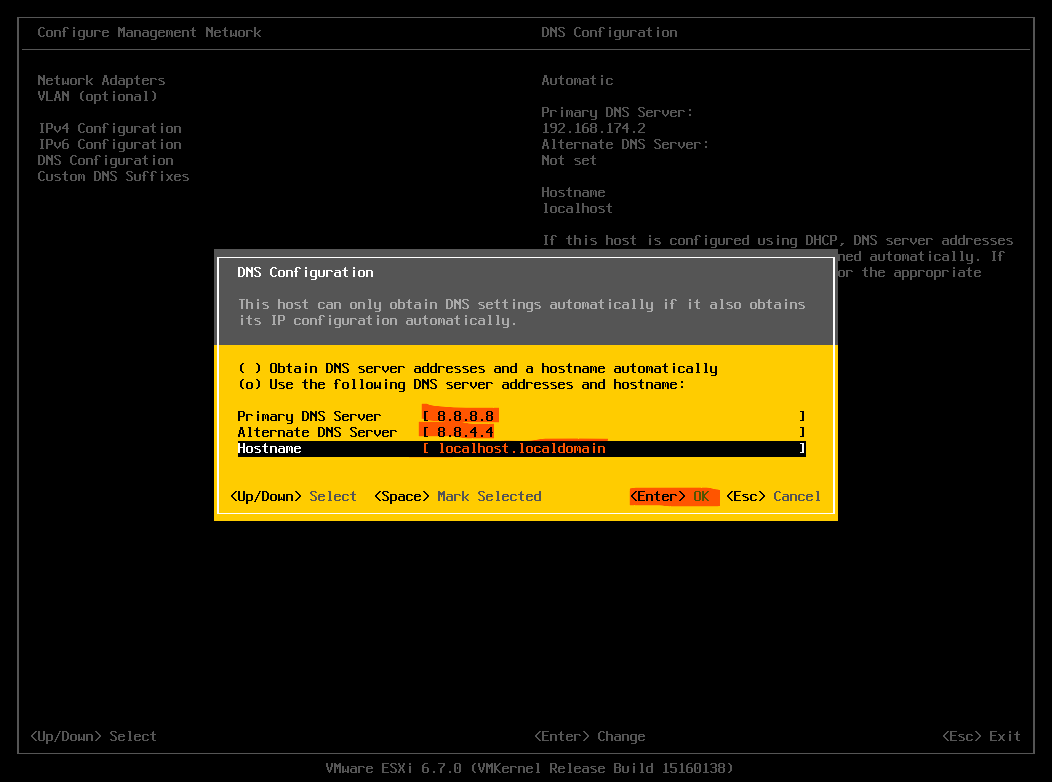
- First we have to provide Primary DNS (8.8.8.8)
- Next we have to provide Alternate DNS (8.8.4.4)
- Lastly we have to provide hostname which must be (localhost.localdomain).
- Hit Enter and it will proceed to next screen.
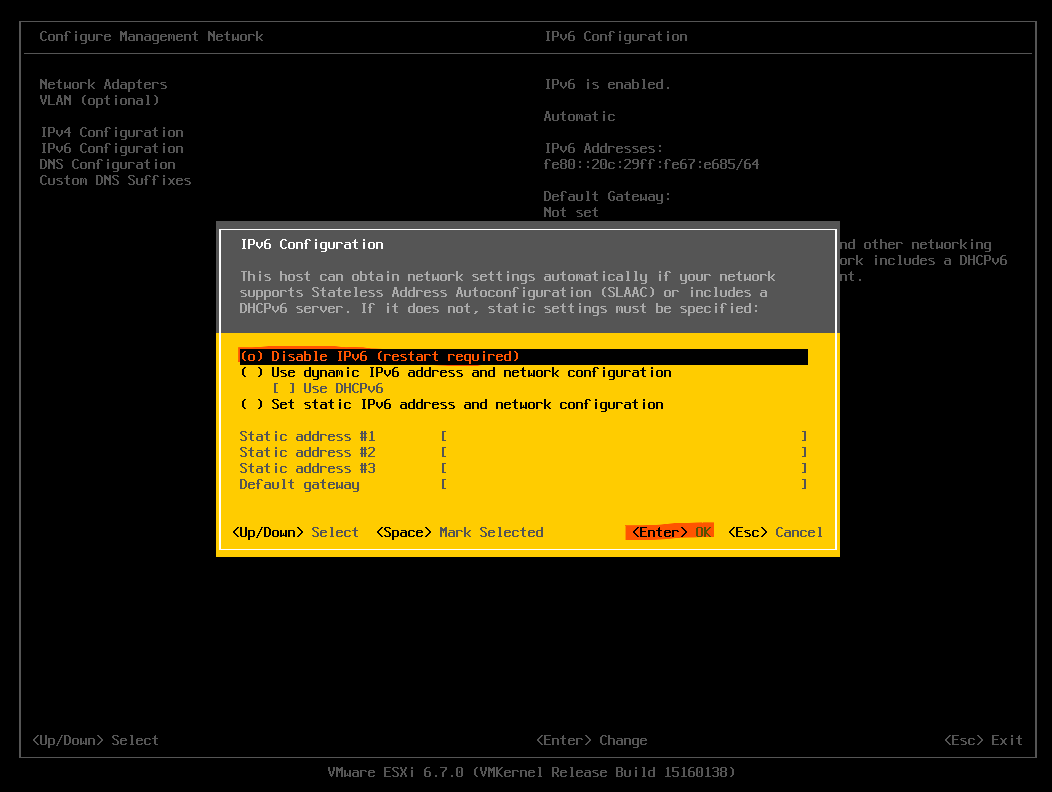
- Now we have to Disable IPv6 Configuration
- From Configure Management Network, Now we will select IPv6 Configuration.
- This will popup the screen like shown here
- Select Disable IPv6 (restart required)
- Hit Enter and it will take us to next screen.
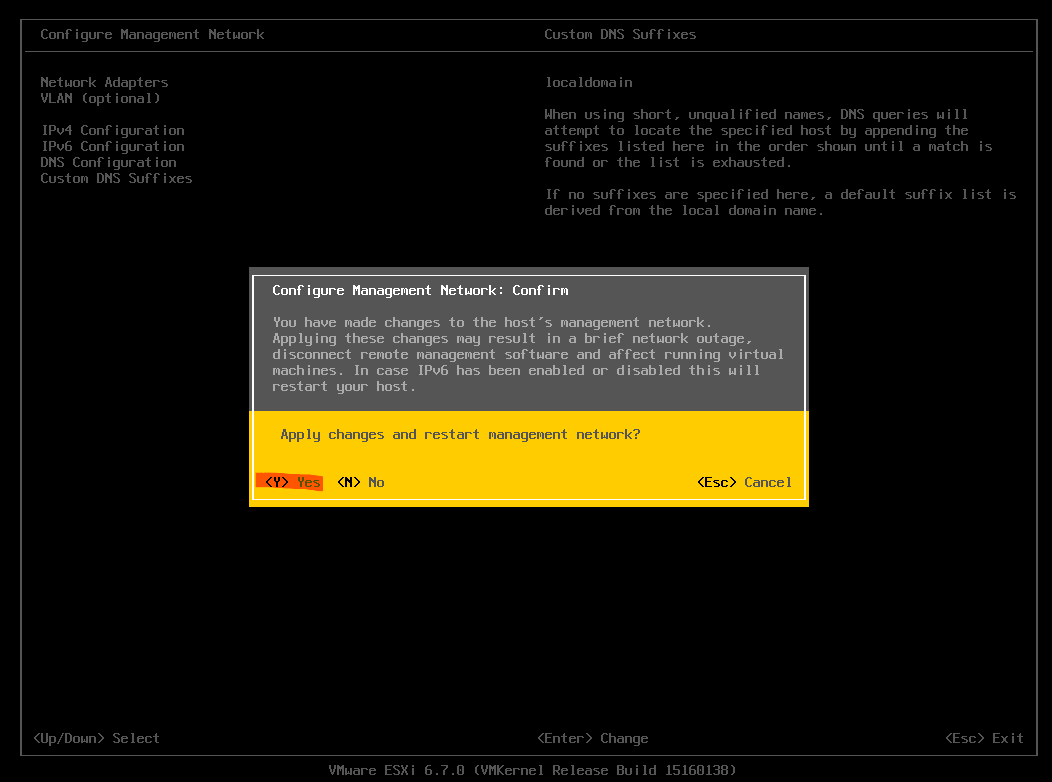
- A Pop up window will appear that will ask us to confirm Network Management Changes
- Simply Hit Y (Y for yes) and It will save the configuration and reboot the ESXi.
- This is the last step, Now we can access ESXi from any machine on same network by entering its IP address and Root Login details.

- If this Black Screen appears then it means your ESXi is properly setup.
- Please check the option To manage this host go to this IPV4.
- Note this IP and open this in Internet Browser in any system on same network.
- Once you open the IP it will take us to next screen.

- Once you have open the IP in Browser then this screen will appear.
- Enter your root credentials.
- Hit Enter and it will take us to next screen.

- This is the Main ESXi Interface.
- This tutorial is complete at this level.
- Thanks for your valuable time.