Documentation
Welcome to WARMUP Doc. ! Get familiar with WARMUP Modules and explore their features:

- Go to WARMUP MODULE
- Then go to Basic Settings
- Here you can select the URL section.
- Here you can enter local IP.
- Here you can enter remote IP.
- By pressing save button entered entries will be saved.

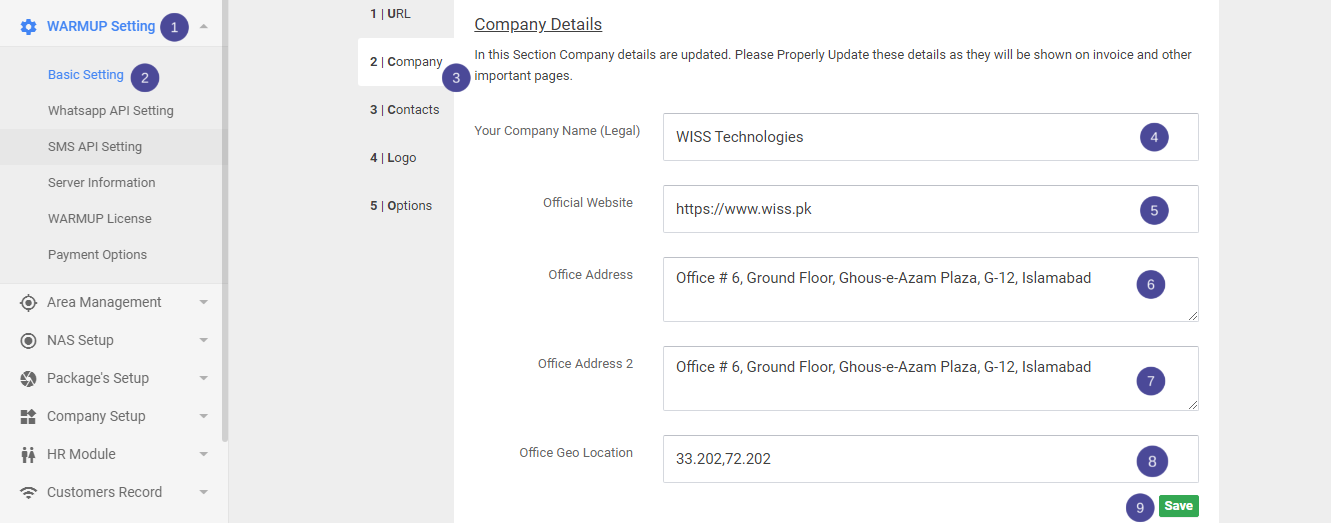
- Go to WARMUP MODULE
- Then go to Basic Settings
- Here you can select company section.
- Here you can enter company name.
- Here you can enter your official website.
- Here you can enter office address.
- Here you can also enter another office address.
- Here you can enter office geo location.
- By pressing save button entered entries will be saved.

- Go to WARMUP MODULE
- Then go to Basic Settings
- Here you can go to contact section.
- Here you can enter support mobile number.
- Here you can enter whatsapp number.
- Here you can enter contact number for support.
- Here you can enter support skype ID.
- Here you can enter support email.
- Here you can enter another support email.
- By pressing save button entered entries will be saved.

- Go to WARMUP MODULE
- Then go to Basic Settings
- Here you can go to logo section.
- Here you can upload logo on login page.
- Here you can upload logo which will be printed on invoice.
- Here you can upload background of login page.
- Here you can upload favicon.
- By pressing upload button you can upload all logo's.

- Go to WARMUP MODULE
- Then go to Basic Settings
- Here you can go to options section.
- Here you can enter footer of login page.
- Here you can enter CPE Router Port.
- Here you can enable SMS API.
- By pressing save button your settings will be saved.
