Documentation
Welcome to WARMUP Doc. ! Get familiar with WARMUP Modules and explore their features:
If the user's role is identified as an admin, then they will be presented with options for selecting country, city, and zone. Alternatively, if the user's role is not identified as an admin, they will only have the options to choose from area and sub-area.
Country Setup

- Go to Area management
- Here you can access the country list.
- From Add new option you can add a new country in the list.
- From here you can export the data in given formats.
- From here you can sort the countries in list.
- Here you can check status active or non-active.
- From here you can edit or delete the entry.
City Setup
.png)
- First enter Country Name
- Enter total no. of houses.
- Tick the check box to activate country or else it will only be added not activated.
- Now add country to list.
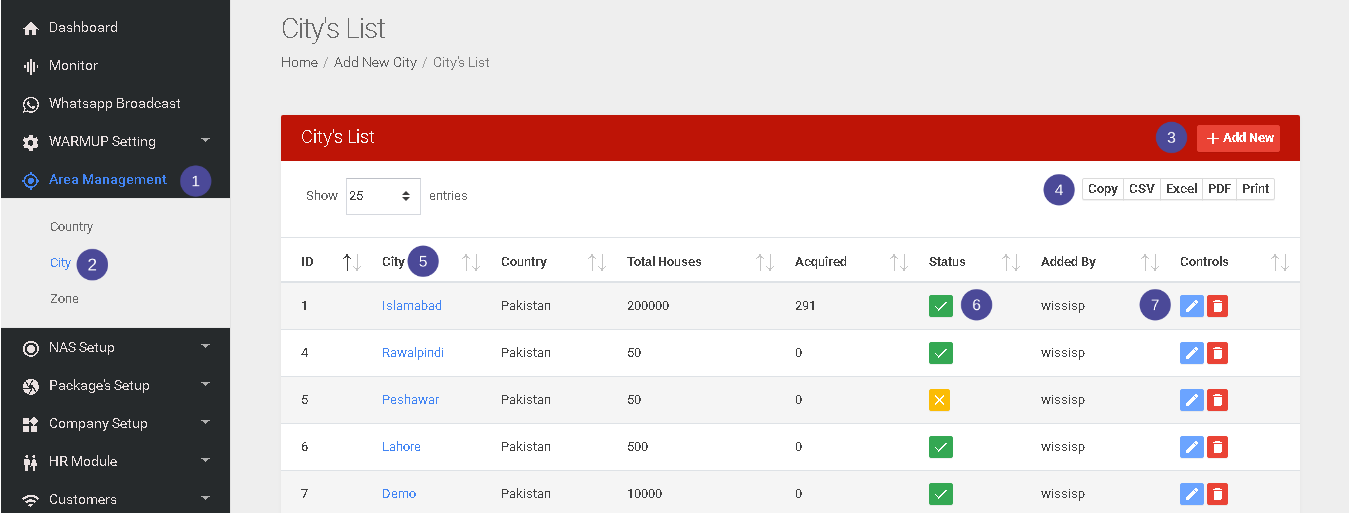
- Go to Area management
- Here you can access the city list.
- From Add new option you can add a new city in the list.
- From here you can export the data in given formats.
- From here you can sort the cities in list.
- Here you can check status active or non-active.
- From here you can edit or delete the entry.
.png)
- First select Country
- Then enter City Name
- Enter total no. of houses.
- Tick the check box to activate city or else it will only be added not activated.
- Now add city to the list.
Zone Setup

- Go to Area management
- Here you can access the Zone's list.
- From Add new option you can add a new zone in the list.
- From here you can export the data in given formats.
- From here you can sort the zone's in list.
- Here you can check status active or non-active.
- From here you can edit or delete the entry.
.png)
- First select City
- Then enter Zone Name
- Enter total no. of houses.
- Tick the check box to activate zone or else it will only be added not activated.
- Now add zone to the list.
Area Setup
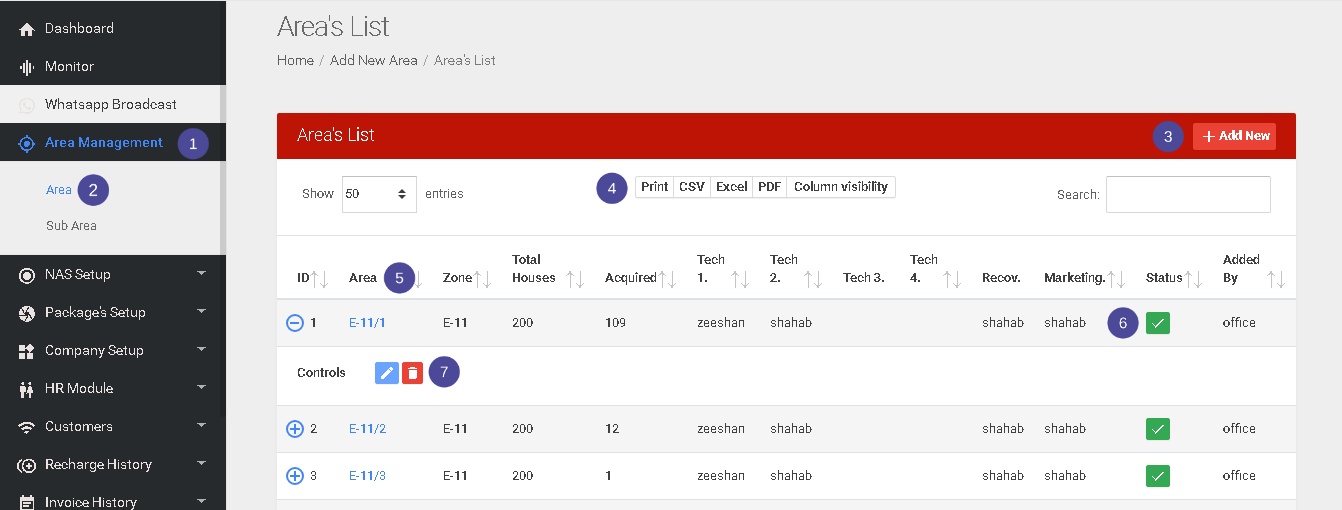
- Go to Area management
- Here you can access the area list.
- From Add new option you can add a new area in the list.
- From here you can export the data in given formats.
- From here you can sort the areas in list.
- Here you can check status active or non-active.
- From here you can edit or delete the entry.
.png)
2.png)
- First select Zone
- Then enter Area name
- Enter total no. of houses.
- Then select Tech Staff member # 1 .
- Then select Tech Staff member # 2 .
- Then select Tech Staff member # 3 .
- Then select Tech Staff member # 4 .
- Then select recovery staff .
- And also select marketting staff.
- Tick the check box to activate area or else it will only be added not activated.
- Now add area to the list.
Sub-Area Setup
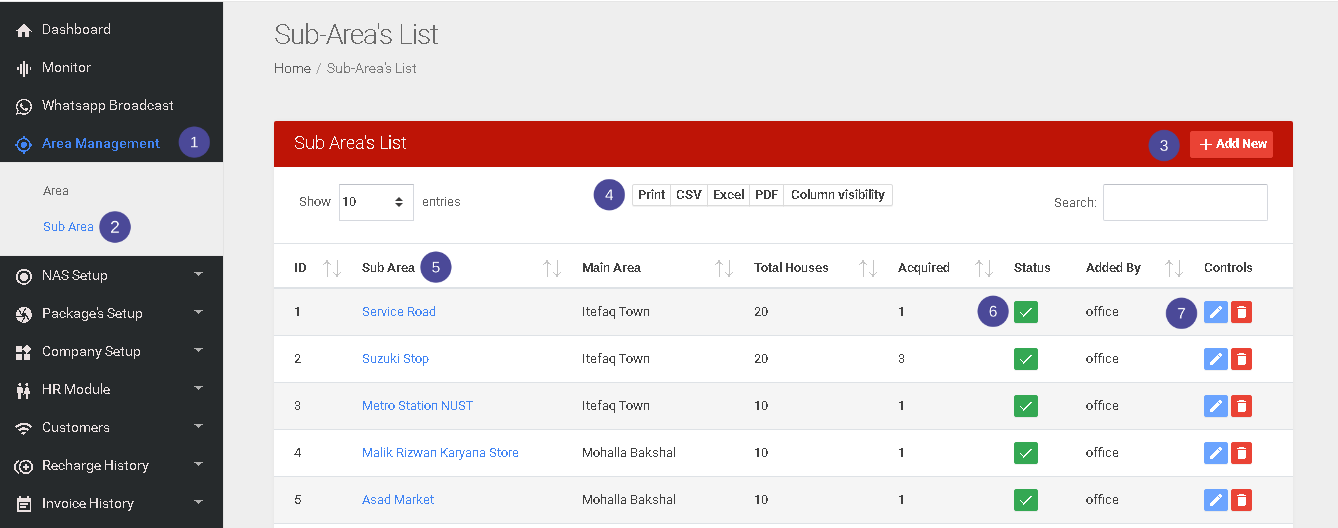
- Go to Area management
- Here you can access the Sub areas list.
- From Add new option you can add a new Sub area in the list.
- From here you can export the data in given formats.
- From here you can sort the Sub areas in list.
- Here you can check status active or non-active.
- From here you can edit or delete the entry.
.PNG)
- First select Main area
- Then enter Sub area name
- Tick the check box to activate sub area or else it will only be added not activated.
- Enter total no. of houses in sub area.
- Now add sub area to the list.